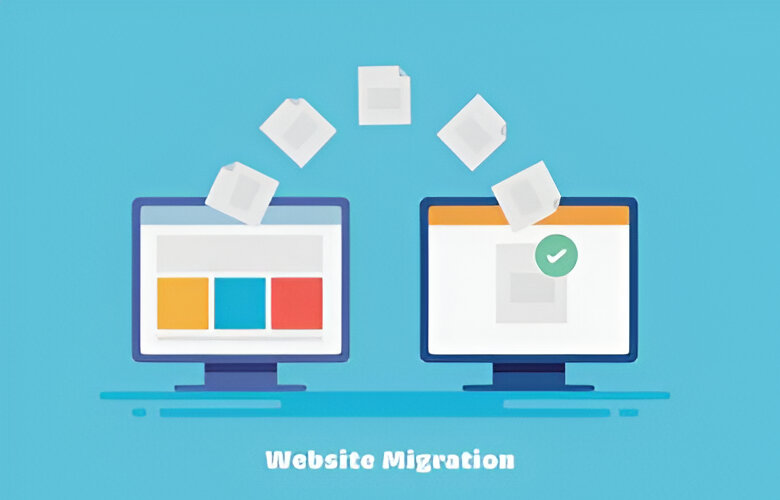
Have your ever been involved in a website migration project? If so, you’re probably aware that these projects can
be quite complex and involve some risks. As an SEO, being involved in all stages of a migration can lend to its
success. Let’s review why this is important, along with the different types of site moves you may encounter.
First, what exactly is a website migration?
According to Moz, “A site migration is a term broadly used by SEO professionals to describe any event whereby a website undergoes substantial changes in areas that can significantly affect search engine visibility — typically changes to the site’s location, platform, structure, content, design, or UX.”
Site migrations, or site moves, are one of the few aspects of SEO that Google documentation doesn’t cover indepth. The existing documentation is linked in the resources section, but there’s a lot more that can happen that you should be aware of. And as most experienced SEOs know well, a migration can often have negative side effects in the form of loss in traffic and a drop in rank. These side effects can last from a few weeks to several months and have the potential to significantly impact a business’s revenue.
However, don’t lose hope just yet.
It is possible to come out the other side of a site migration unscathed, without
having suffered a huge loss in traffic or rank. It all comes down to the planning and execution of the migration.
There are two main categories of migrations:
- Site moves without URL changes
- Site moves with URL changes
In site moves without URL changes, the underlying infrastructure of the website changes, but there are no visible
changes in the URL. An example of this would be migrating to a different hosting provider or CDN while keeping
the same root URL.
Site moves with URL changes make up the bulk of migrations. These happen when the user-visible URL changes in
some way, such as: - Protocol changes, like HTTP to HTTPS.
- Domain name changes, like inbound.com to hubspot.com.
- URL path changes, like hubspot.com/resources to hubspot.com/academy.
Usually, a migration without any URL changes is simpler and more straightforward. When URLs do change, things
can get a little more complex.
This is because the more changes that get introduced at the same time, the higher the complexity and the risks.
Google does suggest migrating your website in sections, particularly if you have a larger site. This is fine to do if
you can manage it.
However, even though making several changes at the same time increases the risks of something going wrong, it
can be more cost-effective for the business from a resources perspective. That is, if the migration is well-planned
and executed.
This is the important piece to keep in mind. Most website migrations fail due to poor planning and strategy, or
late/lack of involvement from SEOs. This is why it’s important as an SEO to get involved in a site migration in the
earliest planning stages to ensure the best chance of success.
To learn how to run a successful website migration step-by-step, check out that video
How to Run a Successful Website Migration
When embarking on a website migration, knowing where to start, what order tasks should be completed in, and
all the SEO considerations that need to be taken into account are crucial to its success.
Let’s review the step-by-step process for running a successful website migration that avoids a significant drop in
traffic and rank.
The first, and arguably most important, phase of a site migration involves preparation and planning.
Start by scoping the project and creating a detailed project plan. Regardless of the reason for the migration, you
need to be clear from the beginning on the objectives so you can set and manage expectations. Ask yourself, why
are you migrating? When do you want it done?
For example, let’s say your client is migrating to a new CMS platform because their old system is clunky and
outdated, and they want a new system with more flexibility for marketers to create and update pages. They want
this migration to be completed within four weeks.
This type of migration will unfold very differently than a business who has acquired another company and needs to
merge that company’s existing website into their own site over the course of three months. These kinds of
variations are why scoping the project in the beginning is so important.
When prepping and planning, make sure to include all relevant stakeholders. This could include, but is not limited
to, developers, webmasters, other SEOs, marketers, and UX specialists. Create a detailed project plan with every
task, its owner, and its due date. Be sure to include any dependencies, or tasks that can’t be completed until
another task is done, and share it with all stakeholders.
The next step in the preparation phase is to create the technical SEO specification. What exactly does this mean? A
technical SEO specification should capture all the SEO elements that need to be changed or transfered to the new
site.
It should include things, like:
- URL structure
- Meta descriptions
- Canonicals
- Title and heading tags
- Internal links
- Sitemaps
- Existing redirects
- Robots.txt
You can organize these elements in whatever way you like, but the most straightforward approach is to use a
spreadsheet with different pages for different elements. You can also use a project management software, like
Asana. In your spec, make sure to include the old site’s information alongside the new site data if anything is
going to change.
If you’re changing domain names, make sure to verify that you own both the old and new sites in Google Search
Console, along with verifying all variants of both sites. For example, both www.hubspot.com and hubspot.com
need to be verified, as well as both HTTP and HTTPS variants if HTTPS URLs are used. You can find more specific
instructions on how to do this in the resources section.
The final piece of prep is to benchmark the current site’s performance and traffic by performing a site audit and
noting how the site is performing today, before the migration begins. This way, you’ll have the data to determine if
you’ve met your objectives. Benchmark metrics include things, like page load time, rank for keywords, organic
traffic, and backlinks.
When working on a migration with URL changes, the next important step is to create a URL mapping file.
URL redirects are absolutely critical in migrations of this kind. Redirects help both searchers and search engines
find pages that no longer exist, have been renamed, or have moved to another location. They also help search
engines understand how the old site’s pages are associated with the new site’s pages, which will allow ranking
signals, or “link juice,” to pass from the old pages to the new pages. If the old URLs aren’t correctly redirected, this
can result in a significant drop in visibility.
There are a few different kinds of redirects, so it’s important that you’re using the right one.
Use 301 (or permanent) redirects when the old URL and new URL are different. These will tell search engines to
index the new URLs as well as forward any ranking signals from the old URLs to the new ones. This also includes
migrating a site from HTTP to HTTPS.
Use 302 (or temporary) redirects only when the redirect is not meant to be permanent. This includes cases when a
URL is likely to need updating or removal in the near future. You should have a lot fewer of these than 301
redirects.
To create a redirect mapping file, use a spreadsheet that includes two columns:
- Old site URL (or a page’s URL on the old site)
- New site URL (or a page’s URL on the new site)
Old pages should be redirected to the most relevant corresponding pages on the new site. If there is no relevant
page to map it to, try mapping it to its parent category page. Avoid redirecting large groups of pages to the
homepage, which can be interpreted by Google as a “soft 404.” This creates a poor user experience and is
generally frowned upon.
It’s also important to avoid redirect chains whenever possible. While Google can follow a chain of multiple
redirects, like page 1 to page 2 to page 3, it’s best practice to redirect straight to the final destination. You can use
Google’s URL Inspection Tool linked in the resources to test your redirects.
Here’s a pro tip: Don’t forget about your image and video files. If these are moving, make sure to redirect the old
URLs to new ones.
By now, you’ve scoped the project, created a project plan, and filled out a redirect mapping file if your migration
includes URL changes. Now, you’re ready to start the actual migration part of the project.